

How to make origami lucky stars
I love making these origami lucky stars. It takes a little practice, but are a great gift and fun activity for kids. Enjoy this video tutorial, or scroll down for written step-by-step instructions.
You can buy specific paper by searching for “origami star paper” but you can also use any size strip of paper.

Start by holding the strip so that it points from your chest away from you. If your paper isn’t colored on both sides, then make sure the white side is facing up. You’ll start by gently folding the bottom of the strip towards the top.

2. Loop the bottom of the strip behind the rest of the strip so that it looks like the awareness ribbons that charities use. You’ll be looping the short side through the loop, almost like you’re tying a knot in the paper.

3. Gently hold the “knot” so that it starts to flatten into the shape of a pentagon. Don’t pinch too hard yet to avoid making creases. You’re going to gently pull on both ends of the strip until the “knot” tightens up and fits snuggly around the width of the strip. You can crease the sides once everything looks even.

4. Tear off the short end, and rotate so the long tail is pointing towards you. Make sure the white side or underside of the paper is still pointing up.

5. Take the end of the tail and fold it forward, on top of itself. You’ll be lacing the tail through the small flap that goes across the pentagon. Pull the tail all the way through until the bottom is level with the pentagon.

6. Rotate so that the tail is pointing towards you again. This time you’re going to fold the paper along the bottom of the pentagon, and the paper will naturally lean towards the right side of the pentagon.
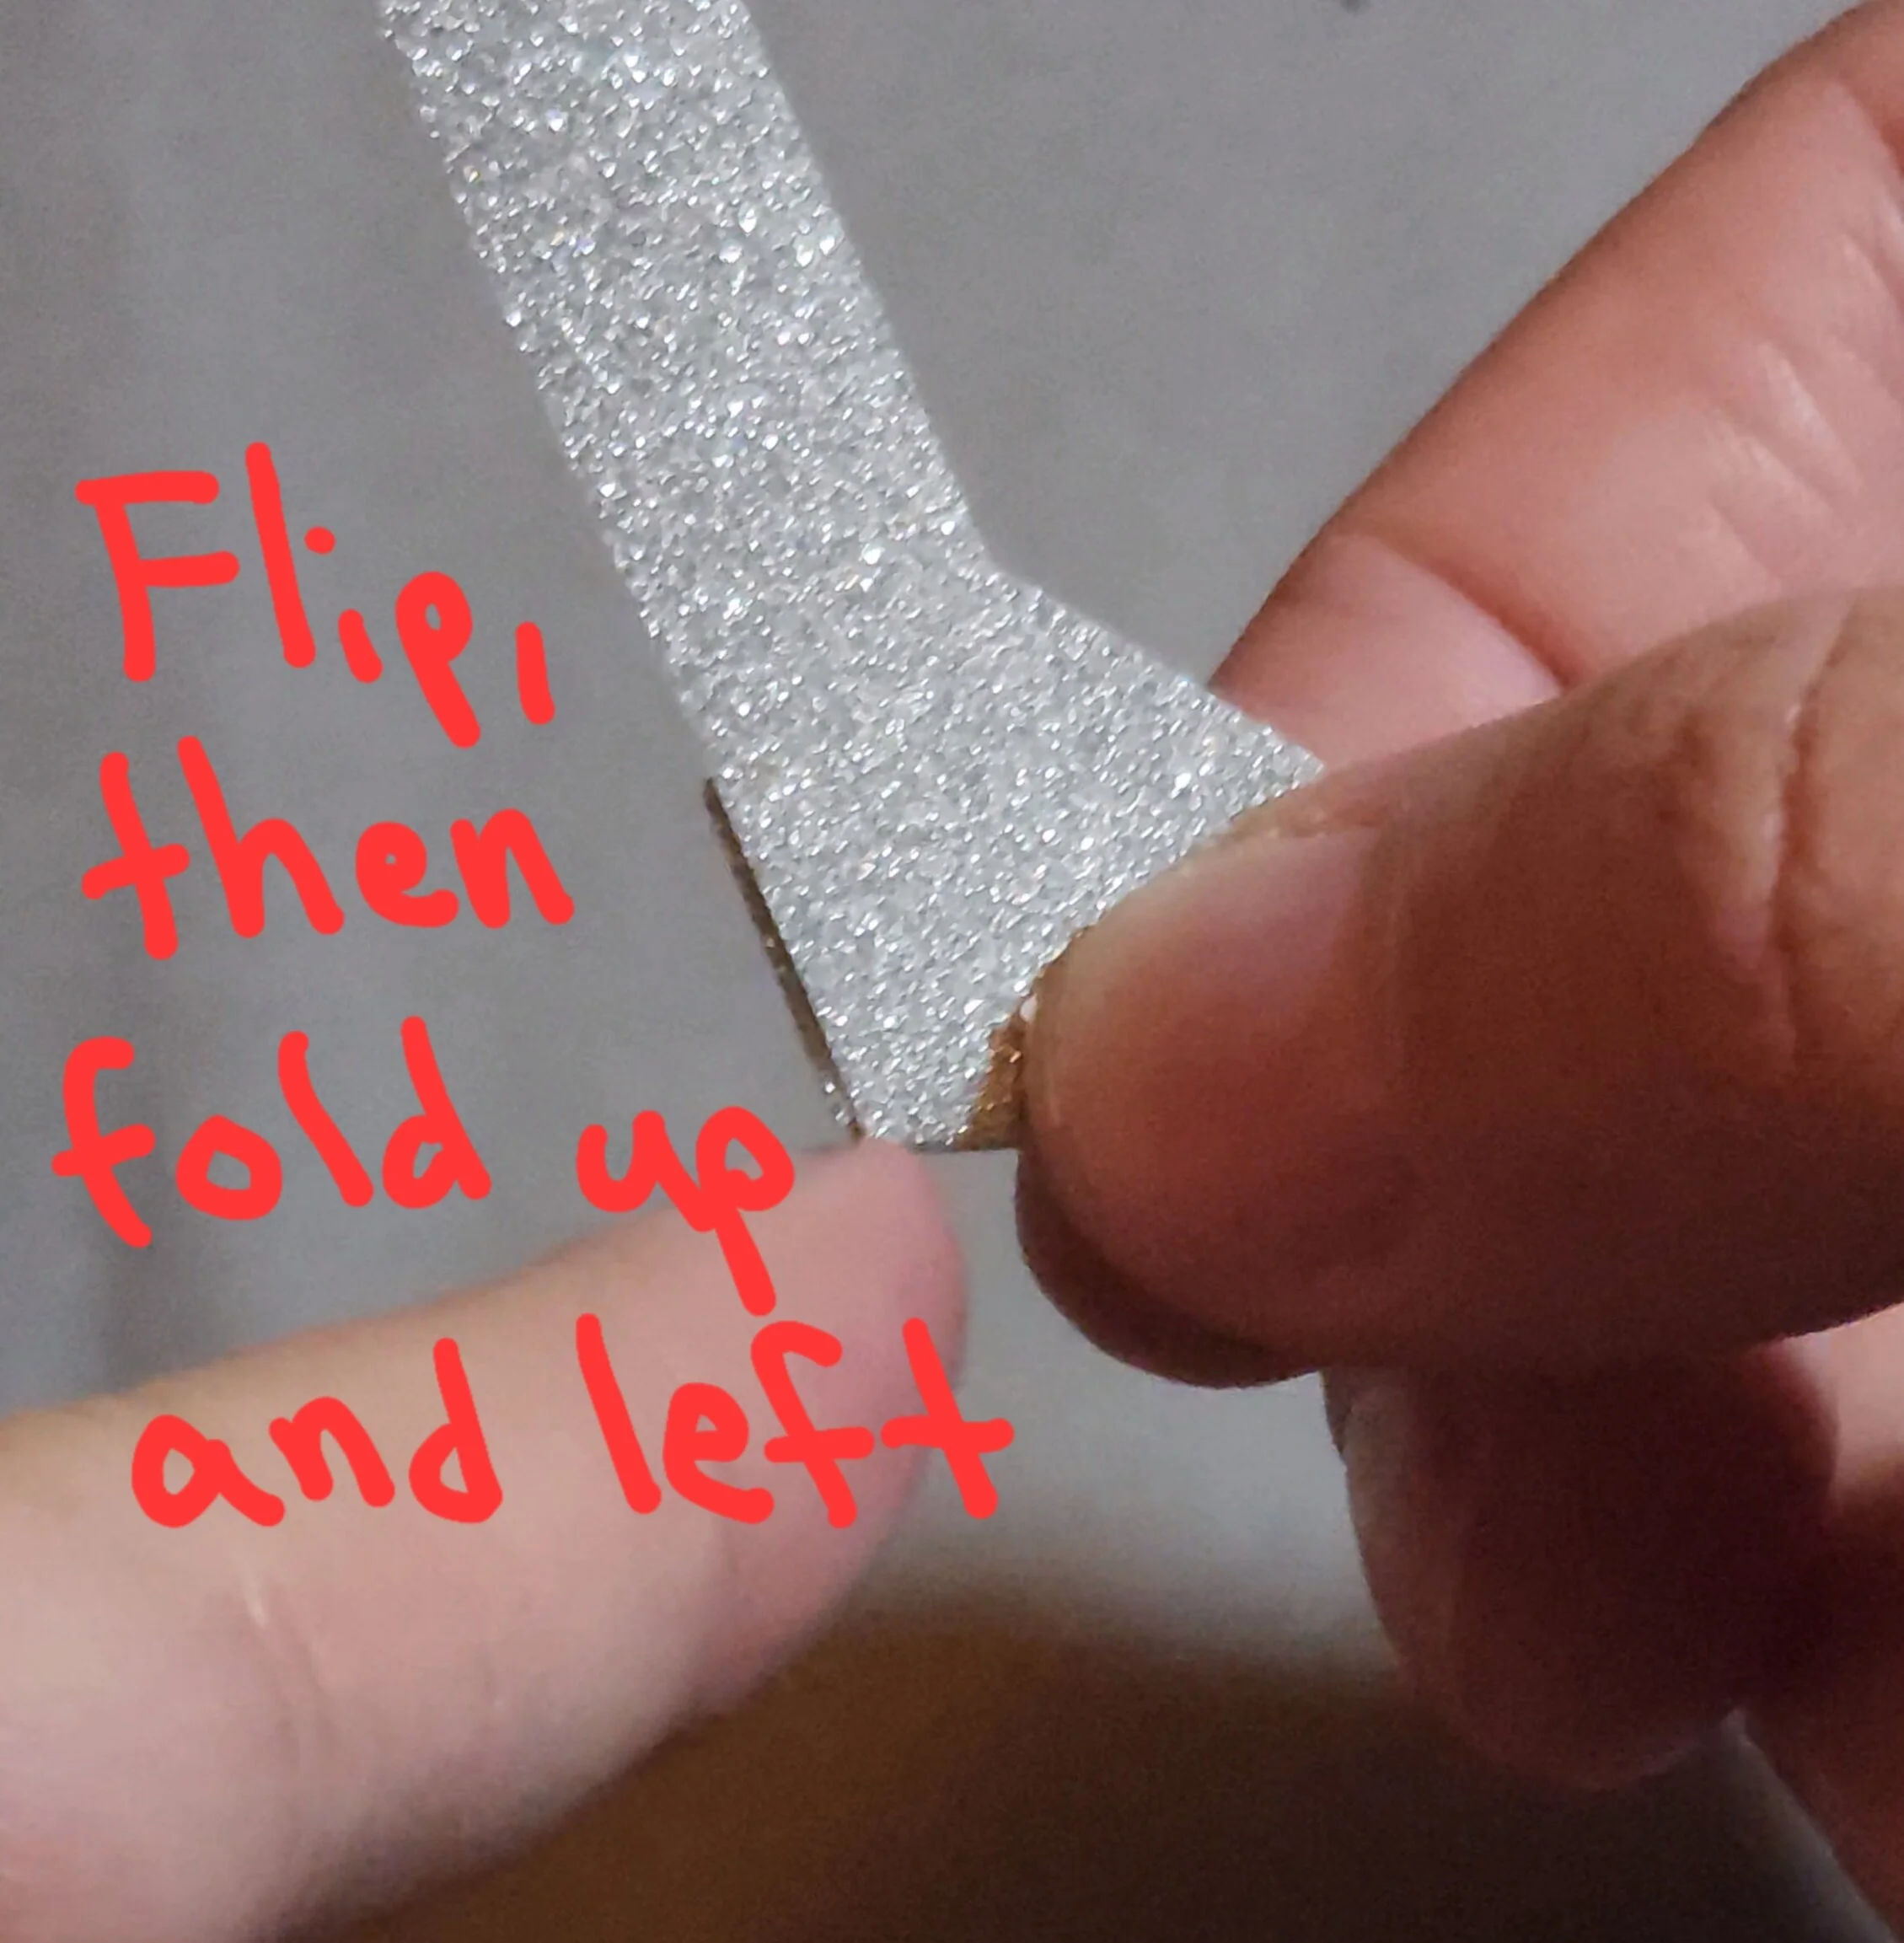
7. Flip over so the tail is pointing towards you again, and repeat folding along the bottom, except this time the tail will naturally go towards the left side.

8. Repeat folding along the bottom with the paper alternating between the right and left side of the pentagon until you run out of tail. Make sure you have enough length left to fold under the flap that goes across the pentagon.

9. If you end up having a tiny bit left, you can tear it off.

10. Now that you have a perfect pentagon, we’re going to press into the sides to make the star points. Find the center of one of the sides and press inwards towards the center of the pentagon with your finger nail.
*note - this part can be tricky at first, so be kind to yourself and have patience if it takes a few stars to get the hang of.

11. Repeat on all sides of the pentagon until you have a perfect lucky star!
You can fill up lots of cute containers with them. I also like to tell people that they’re wishes, so whenever you need a wish, take one out and bury it in the ground. (Make sure your star is 100% paper with no plastic or glitter based decoration.)
Have fun folding!